Tuesday, October 2, 2018

High Chair Makeover

Nearly three years since my last post, wow! (Those koolaid hats are still a favorite past project)

If you haven’t been keeping up with me on facebook, well, H is no longer a toddler, but is in kindergarten (how did that happen so quick?), we’ve moved, adopted two dogs, and had a baby girl who is just about to start eating solid foods. Time for a high chair!


I had gotten a wooden one from a restaurant going out of business and decided to give it a makeover for baby W.


First I had to remove all the crud, which I did with help from Goo Gone, a wire brush, dish detergent, and some sandpaper. Much better already!


Then I primed and painted a pretty purple. I decided instead of washing and reinstalling the straps, I would make a fabric strap that could be easily taken off and washed. It also serves as a small cushion in the back.


It secures with snaps underneath (out of reach from baby fingers)


She loves it! And she enjoys being up on our level at dinner time


Sunday, December 20, 2015

Kool-Aid Hat Project

Merry Christmas and Happy Holidays everyone!

I came up with something fun to make for H's little friends, and he got to help! We made custom colored hats, using wool yarn dyed with Kool-Aid.

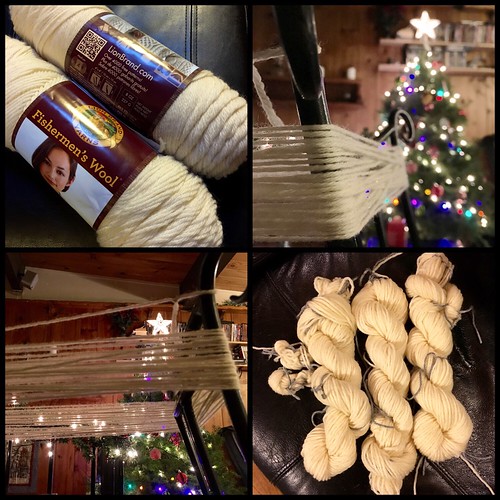
First I got some Fisherman's Wool from Lion Brand, and wound them into long skeins using these iron chairs. The loops ended up being about 9 feet, and I first made up a test hat and measured to see how much yarn I'd need for each. Then I remembered about pom-poms, so I wound those separately. See the little tiny skeins on the left side of the last picture? Those are for pom-poms.

Raw Yarn

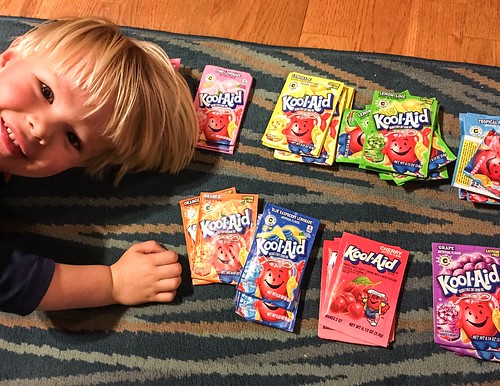
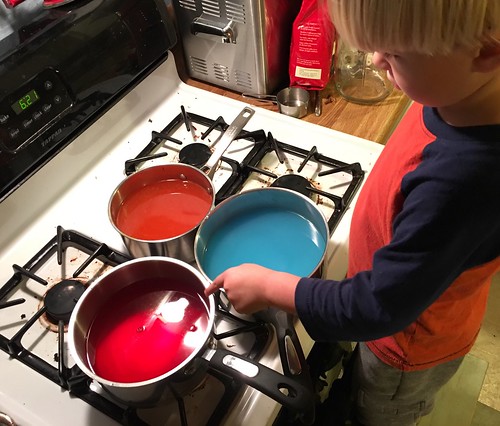
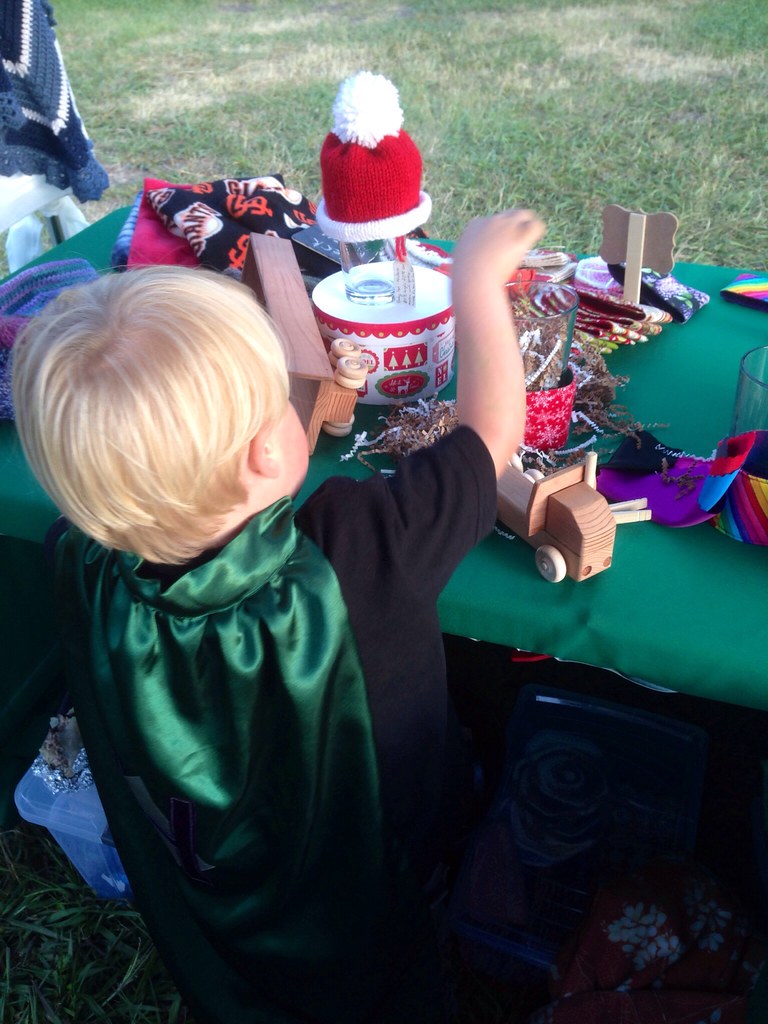
H was super excited about this project. Here he is getting ready to pick out the color combinations. I only helped by suggesting: "What colors do they like? What colors do you see them wearing?" otherwise the combos were all chosen by him.

Choosing Colors

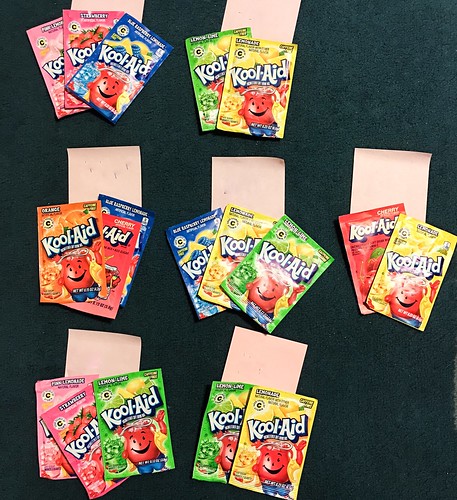
Color combos! We ended up picking three for everyone, so a couple of these are still waiting for the third color choice.

Colors Chosen

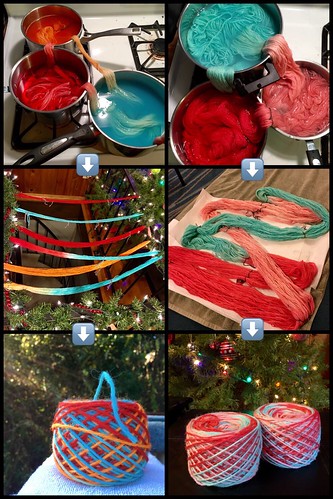
Everything was dyed on the stove top. H helped put the packets in the water and by stirring the yarn.

Starting the Dye

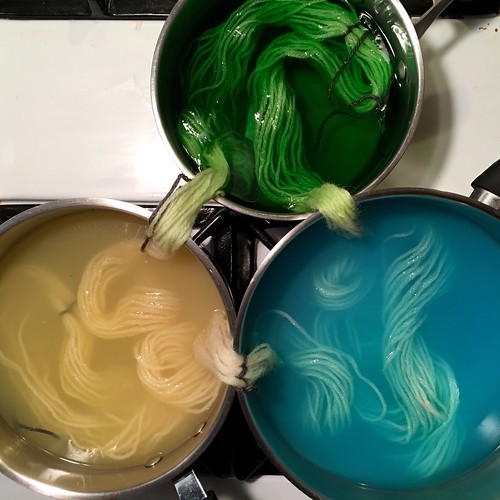
When it first goes in the pot, the water is colored, and within 30 minutes we saw the yarn soak up the colors, and the water went clear.

Cooking in the Color

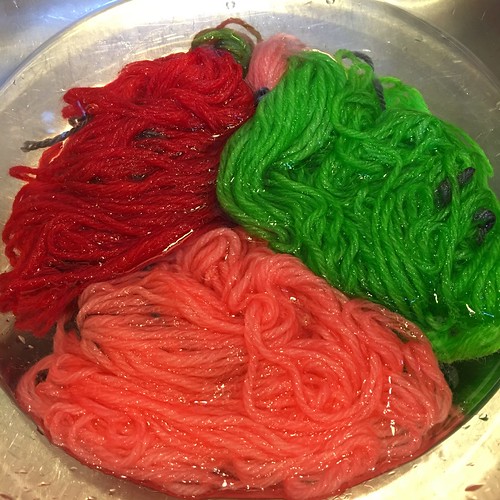
Rinsing out in a glass bowl in the sink. With wool yarn, you have to be careful not to agitated too much, and not to switch temperatures too fast, or else it will felt.

Rinsing out the dye

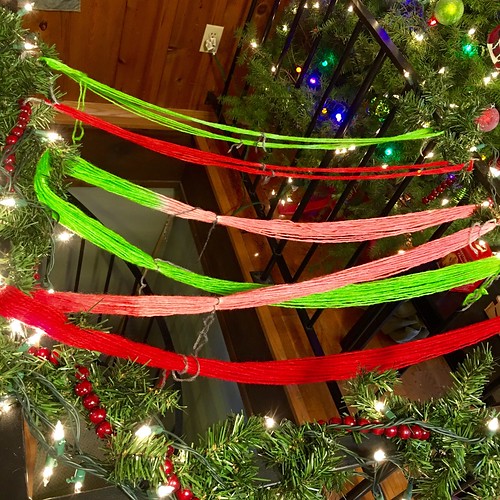
Hanging out to dry on our decorated balcony. This worked perfectly because there's a ceiling fan above it.

Hanging to Dry

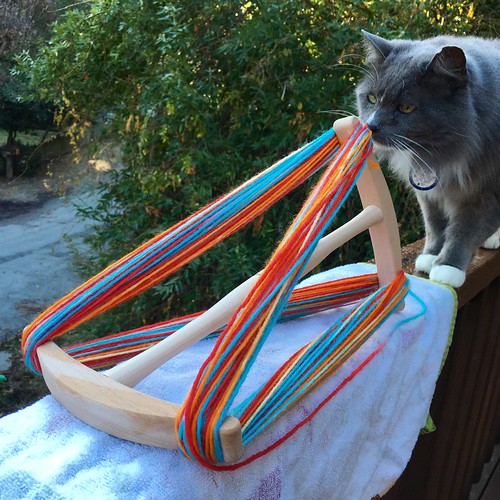
Then I wound it on the niddy noddy, which H thinks is a hilarious name. Casper then inspected the yarn :)

On the Niddy Noddy

Here's a sequence of three yarns. Soaking in the dye, wrapped up in a towel and hung to dry, and then wound into a ball.

Dye-Dry-Wind

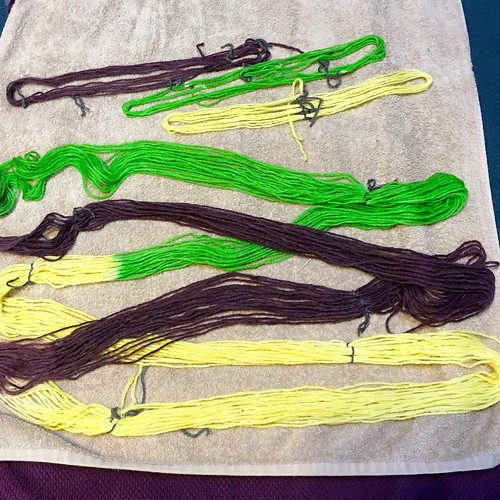
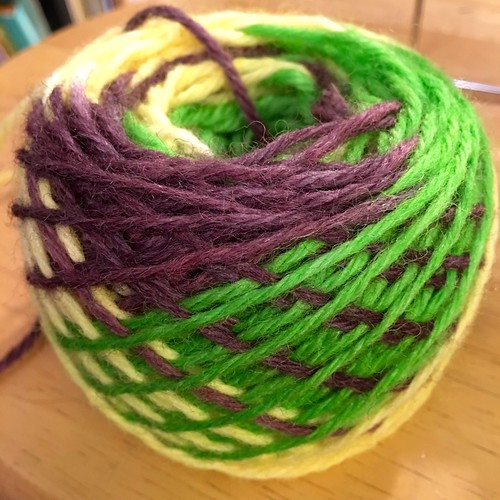
This was a fun color combination. I worried that the purple would be too dark, but once it dried it looked great.

Purple-Green-Yellow

Pretty yarn! I love how the colors looked different at each stage.

Pretty Ball of Yarn

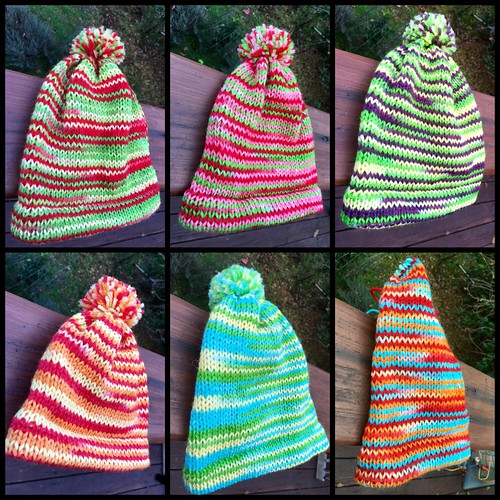
I then knit them up together on my knitting machine, and stitched them up.

All Stitched Up

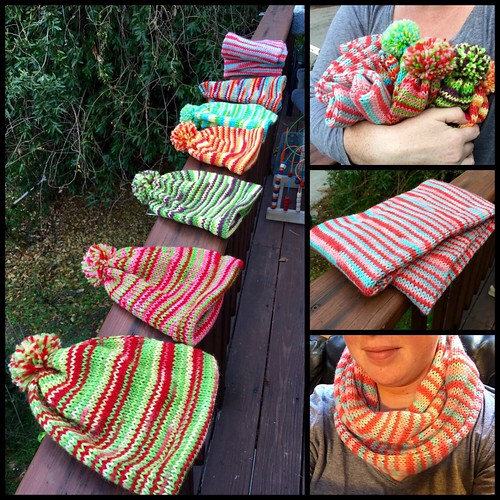
All finished! We made 6 hats, one for each classmate (and one for H), and then an infinity scarf for his teacher.

Finished Hats

Here they are all lined up, and me modeling the scarf. So much fun!

Hats and Scarf


Monday, August 3, 2015

My Water Kefir Adventures

I've been making water kefir for awhile now, and I love it! I'm sharing my experiences for a couple reasons. First, I get a lot of responses like: "What IS that stuff??", and then I wanted to show how easy it is to maintain. It's just like a pet (without the vet bills...) that needs attention on a daily basis.

My favorite source of information is Cultures for Health. Go to the "Learn" tab and click on "Expert Advice Articles" and you can read all about water kefir in addition to other types of cultured foods. They also sell the starter cultures and supplies. I bought their water kefir grains from my local feed store.

Apologies for the low light photos. Our skylights are covered so the house doesn't roast (as much) during the summer.


From left to right:
  • Kirkland Lemonade from Costco, one of our favorite juice flavors to add.
  • Regular old white sugar to feed the kefir grains.
  • My half-gallon jar and my green quart jar (covered) to culture the grains.
  • (in back) a flip-top jar with metal funnel getting ready for a second ferment.
  • My white strainer on top of a blue mason jar funnel that just poured into a pint jar.
  • My purple handled Brita filter for a water source.
Oh, and the baby monitor. It was nap time :) Speaking of the little guy, he loves this stuff. He asks me for "kefir lemonade".


This is what the grains look like up close. I would describe milk kefir grains as looking like cottage cheese, and these are similar in size and texture, but they're a brownish clear, since it's cultured in sugar water.

Much of the finished product I'll put into pint jars and add some lemonade or other juice at about a 1:3 ratio. I was doing half-and-half until we got used to the kefir flavor, and now I add less, only enough to flavor it.


This is a flip-top bottle fresh from the fridge. See the frosty neck? Some of the kefir water I'll pour into one of these and do what's called a "second ferment". My favorite flavors for that right now are lemon or orange (fresh squeezed) with some ginger added. I'm still experimenting with the right amount of flavoring and time to get it to fizz.


Right now I have one half gallon and one quart (the glass is green). As it cultures, I've noticed there are little bubbles that float upwards, and sometimes the grains go with it. You can see one of them in the clear jar about halfway up.

If I have all my extra jars and lids washed, then it only takes me about 10 minutes to strain the kefir out and prepare new. I just picked up a second half gallon jar so I don't have to wash it in the middle of making the kefir.

Here's what I do:
  1. Set out all my jars and bottle, and start gathering the flavors.
  2. Heat up about 2 cups of water (microwave since it's so hot) and set it aside.
  3. Strain the finished kefir through a plastic strainer and through the mason jar funnel into the jars and bottle, leaving space for flavors.
  4. Pour the sugar into a clean quart and half gallon jar - 1/4 cup per quart of kefir.
  5. Pour the hot water over the sugar, swirl it to mix, adding more water as needed to dissolve it completely.
  6. Pour more filtered water over the sugar water to make it nearly full and bring it closer to room temperature.*
  7. Return the kefir grains into the cooled (68-85 degrees) sugar water, and put a cloth or paper towel over the top with a rubber band to make sure it stays clean. Set on counter.
  8. Add the flavors to the mason jars, label them, and put them in the fridge.
  9. Add flavors to the flip top bottle and set it on the counter with a chalkboard sign reminding me what it is and when it'll be ready to chill and drink.
  10. Write the day and time (AM, Noon, or PM) on the chalkboard sign for the new kefir.
  11. Wash my strainer and funnels (always right away so they're ready), clean up jars and wipe down any spills.
  12. Add water to my Brita filter.
* The directions I've read talk about heating up ALL the water to add the sugar, and then letting it cool to the required 68-85 degrees. I've found I only need a small amount of hot water to dissolve it, and then by adding cooler water, I don't have to wait hours for the whole thing to cool. So far this has worked for me, so that's just the way I do it.


I use a dry-erase marker on the top of the metal jars to tell me what's inside and when it started chilling. I don't use mason jars for the second ferment after I had one of them bump out on me. Uh oh! Now I only use the flip tops that are made for holding pressure.


I hope you're inspired!  And if you liked this post, please let me know in the comments below :)

Note that this is not sponsored content, nor are there any affiliate links. I see so many of those now, that I thought I would mention it.


Thursday, June 18, 2015

Redwood Mountain Wrapup

Ok, so I tried to post this a couple weeks ago, but was having trouble with my blogger app. Apologies for the delay!

This year was my first time as a vender at the Redwood Mountain Faire at Roaring Camp in Felton, and it was such a wonderful experience.


The faire is an amazing event designed to benefit local nonprofits and showcase many local artists and musical talents.

My booth was in the kids section, which was great since my little guy was having a blast there.


I enlisted his help to advertise my shirts :)


These earrings are now available in my shop.


A lady came by on Saturday and wanted to order my custom toddler capes for her granddaughters. She was very happy with the results.


And here's H wearing his green cape, helping me tear down my "winter section" at the end of the faire.


I can't wait to do it again next year!!


Ps- check out my Facebook page, and Like it if you want to get more up-to-the-minute updates.


Tuesday, April 14, 2015

Shoe Bin Redo

Okay, so this isn't as much a craft project as it is simple organization, but I always love seeing a good before-and-after.

I also love finding a good solution that cost absolutely nothing, since I already had the shelves around the house.

This is our "shoe bin." It's an old cat tree that had been largely ignored, especially the lower level, which worked great for our two-year-old to put his shoes, until it got out of hand. Messy!


He's like: whoa, where did it go?


New shelves!


Much better! A place for shoes and jackets. (Also, look at that spiffy haircut!)


The top shelf, I've discovered, is a great place to put a stack of folded toddler clothes, all ready to be put on in the morning. Because I'm that organized now (har har)


Saturday, March 7, 2015

Camo Pants

First of all, I have some news. I (finally) have a brand new Facebook page! Check it out, and "like" if you want to follow my crafty posts. You won't be disappointed!

I started these camo pants last week, and was excited to be nearly finishing a project in a day. But something looked off, and if I had looked closer at the pattern, I would have seen that they're meant to be shorts! (view D) I thought they looked wide, but didn't realize how out of proportion they'd be when I just trimmed a little off the length to fit H.

So this is take 2. I decided to make the hearts in a slightly different fabric, and I like how they turned out.


When we picked out this fabric, H said "I love it!" And when I told him I'd make him pants, he added definitively: "and shirt." ...and he did this each time I talked about the pants. Now I'm not a HUGE camo fan, so the thought of pants and a shirt/jacket was a bit much...

So I thought I'd give this a try. I took the heart cutout from these shirts, and gave it to H to see if he liked it. Sold! I'll sew it on after the pants are done.


Here's my favorite way to sew a reinforced pocket in one go. You start with a short bit of zig-zag on one side, and then run a straight stitch on the outside around the three sides. Then do another bit of zig-zag, turn it around and sew the second straight stitch back.


Wednesday, February 25, 2015

Baby Backpack

Last summer I made a backpack for my little guy. He loves bright colors and rainbows, and I found this fabulous fabric on the sale table.


I used a pattern from The Green Pepper, their drawstring daypack. I made a couple modifications, and I think it turned out great. Now he's looking much more grown up, and it doesn't look quite so huge on him. He loves his backpack!


And here's a sneak peek of what I'm working on today. Bathing suit time!!


H loves the stars, and got so excited when I showed him the fabric. It's not the standard suit fabric, but it's polyester and should be great.  One of the things I don't like about boys' swim trunks is that they're made out of such stiff fabric and restrict their movement, especially for little guys.